yey’maps offers a user-friendly interface and powerful features for creating customized maps. If you’re new to yey’maps or need guidance on setting up a new map project, this article will provide a step-by-step walkthrough. From accessing the Maps tab to navigating through the various settings, we’ll cover everything you need to know to create a successful yey’maps map.
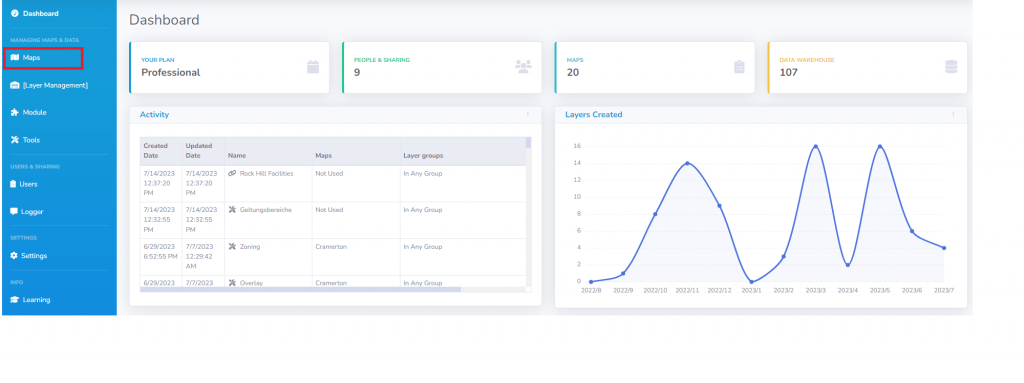
Step 1: Access the Maps Tab
To begin setting up your new yey’maps map, navigate to the Maps tab located on the left side of the yey’maps interface. Click on the tab to proceed.
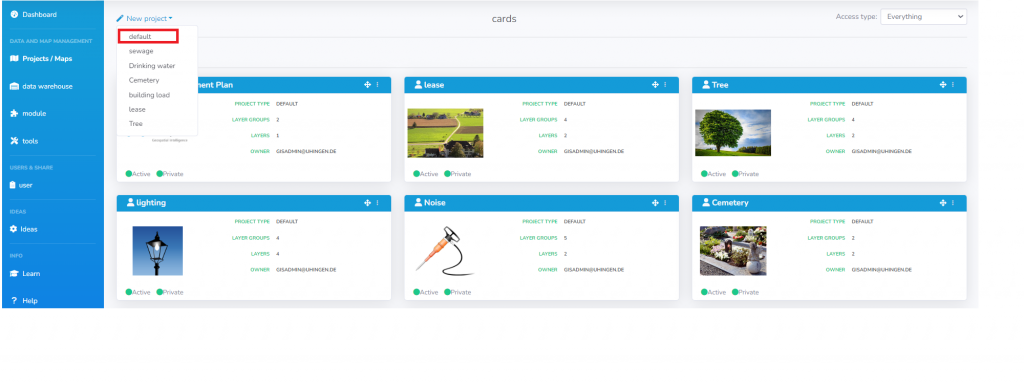
Step 2: Select “New Project”
Once you’re on the Maps tab, look for the option labeled “New Project.” Clicking on it will open a dropdown menu displaying all the available options. Note that additional options may appear if specific modules are activated.

Step 3: Choose the Default Option
In the dropdown menu, select the “Default” option to create a new project. After choosing this option, you will give your project and title and a projection. This can be changed later if needed. Once you click save, the project settings window will open.
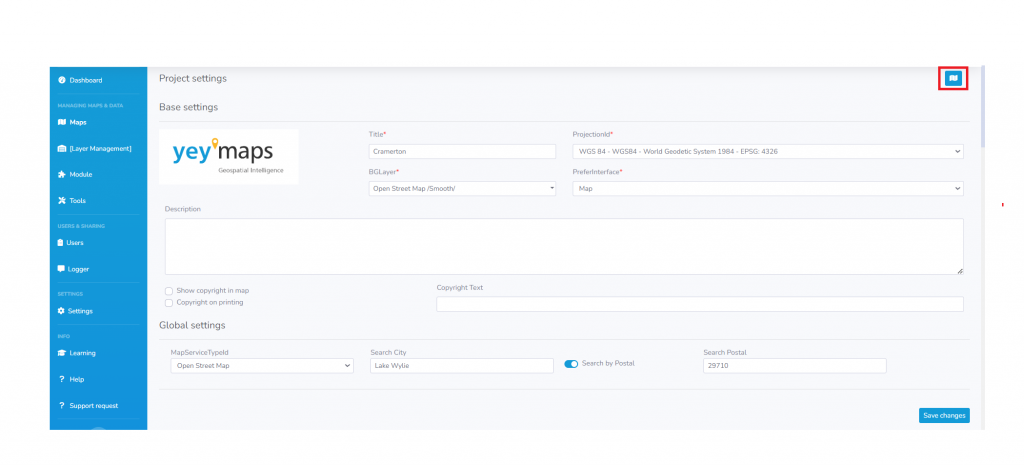
Step 4: Customize Base Settings
In the Project Settings, you will find several sections to modify. Let’s start with the Base Settings, which include the following options:
Title: Edit the name of your project to give it a descriptive label.
Projection ID: Modify the projection of your project to ensure accurate spatial representation.
BG Layer: Change the primary base map of your project according to your preferences.
Preferred Interface: Choose whether you want the project to open as the map interface or a specified module.
Description: Provide a detailed description to give more information about your project.
Copyright: Decide whether to display a copyright notice and customize its content.

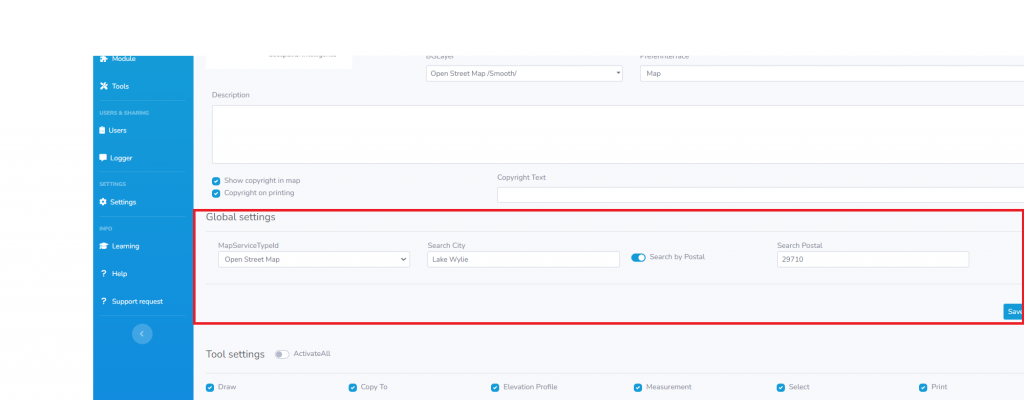
Step 5: Configure Global Settings
Next, move on to the Global Settings section, where you can make your project work smarter by choosing the zip code or city you will be working in. This selection ensures that your project focuses on relevant geographical data.
Step 6: Activate Tool Settings
In the Tool Settings section, you can activate specific tools that you and your team would like to use in the project. Customize this section to align with your project’s requirements.

Step 7: Customize Layer Settings
Proceed to the Layer Settings section, where you can choose which layers you want to include and work within your project. This selection allows you to focus on the specific geospatial data relevant to your project.

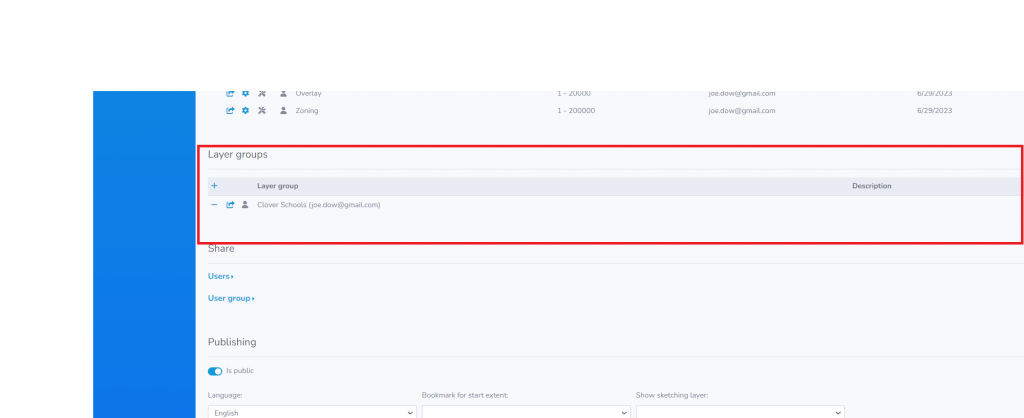
Step 8: Configure Layer Group Settings
In the Layer Group Settings, you can choose which layer groups you would like to work within your project. Note that any layers within a group layer will also appear under the Layer Settings section.
Step 9: Define Share Settings
The Share Settings section enables you to choose which users and user groups you would like to share the project with. Set their user roles to control their permissions and collaboration capabilities.

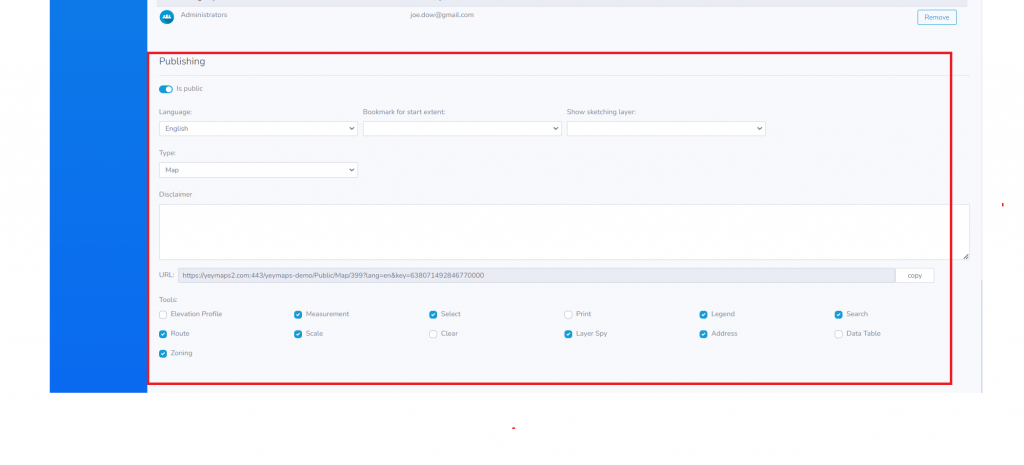
Step 10: Set Publishing Settings
If you want to make your project public, configure the Publishing Settings accordingly. Here, you can specify language settings, bookmark extent, available sketching layers, user interface preferences, disclaimers, plugin URLs, and tool accessibility for the published project.
Step 11: Save and Navigate to the Map
Once you have made all the desired edits in the Project Settings, click the “Save” button to apply your changes. To jump to the map, click the map icon located in the upper right corner of the settings page.
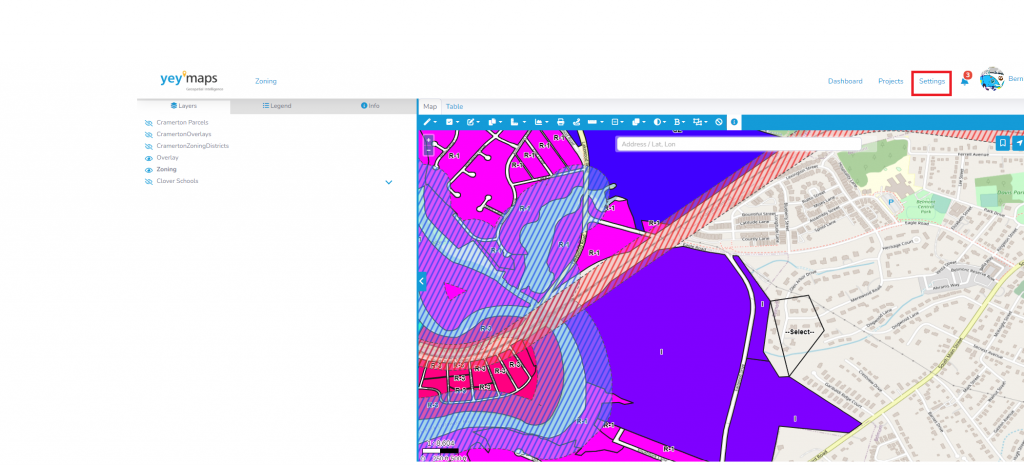
Step 12: Access Project Settings from the Map
If you need to make further adjustments to your project settings, you can easily access them from the map interface. Simply click on the settings tab located in the upper right corner of the page.
Setting up a new yey’maps map is a simple and intuitive process. By following the step-by-step guide outlined above, you can create a customized map tailored to your specific needs. From editing base settings and configuring global options to activating tools, managing layers, and defining sharing and publishing settings, yey’maps provides a comprehensive set of features to ensure a seamless mapping experience. Explore the possibilities, unleash your creativity, and build engaging maps with yey’maps.